


Before you install ALM 12.5, please verify that you meet at least following system requirements, these are from HP:
ALM Server-Side Hardware Requirements
The following table lists the minimum hardware requirements for installing ALM on a server machine:
|
CPU |
Windows: Quad Core AMD64 processor or equivalent x86-compatible processor Linux: Quad Core AMD64 processor or equivalent x86-compatible processor |
|
Memory (RAM) |
8 GB |
|
Free disk space |
8 GB |
Recommended ALM Server-Side Environments
The following table lists the recommended configurations for each operating system:
|
Operating System |
Database Server
|
Web Server |
||
|
Microsoft Windows Server 2012 R2 |
Microsoft SQL Server 2014 |
Microsoft IIS 8.5 |
|
Red Hat Enterprise Linux 6.x 64-bit |
Oracle 12c |
ALM Client System Requirements
The following are the client-side system requirements and configurations for installing an HP ALM/HP Quality Center Enterprise client:
|
CPU |
Core duo 1.6 GHz (or faster) or equivalent compatible processor |
|
Memory (RAM) |
2 GB |
|
Free disk space |
2 GB |
Recommended ALM Client Environments
The following table lists the recommended client configuration:
|
Operating System |
Browser |
Office Suite |
|
Microsoft Windows 8.1 64-bit |
Microsoft Internet Explorer 11 |
Microsoft Office 2013 32-bit |
ALM Desktop Client Supported Environments
The following table lists all supported ALM Desktop client configurations.
However, to ensure best performance and quick support resolutions, use one of the Recommended ALM Client Environments.
|
Prerequisites |
· Microsoft .NET Framework 4.0 / Microsoft .NET Framework 4.5 · Microsoft Office 2010 / Microsoft Office 2013 |
|
Operating Systems |
· Microsoft Windows 7 SP1 32-bit · Microsoft Windows 7 SP1 64-bit · Microsoft Windows 8.1 32-bit · Microsoft Windows 8.1 64-bit Note: · If you are integrating Quality Center with other HP testing tools, you must modify the DCOM permissions on your client machine. · DCOM is not required for running functional test sets (server-side execution). · Functional test sets are available only in ALM Edition. · HP ALM Client on Windows 64-bit runs in WOW64 mode. |
|
Browsers |
· Microsoft Internet Explorer 10 32-bit · Microsoft Internet Explorer 11 32-bit Note: For customers who have restrictions on plug-ins in their browsers, such as ActiveX, HP ALM can be loaded in the HP ALM Explorer Add-in. For more information on downloading and installing the Add-in, see the HP Application Lifecycle Management Installation and Upgrade Guide. |
|
Office Suites |
· Microsoft Office 2010 32-bit · Microsoft Office 2010 64-bit (Excel add-in only) · Microsoft Office 2013 32-bit · Microsoft Office 2013 64-bit (Excel add-in only) |
|
Virtual Environments |
· Citrix XenApp 6.0 or later · Microsoft Terminal Services · Remote Desktop Services Note: HP ALM is certified to work with Citrix XenApp, Microsoft Terminal Services and Remote Desktop Services. Due to the rapidly evolving architectures provided by Virtualization vendors as long as the above stated vendor guarantees full compatibility of the virtualized environment to the HP ALM approved system requirements for physical hardware, then HP ALM will function as designed. |
|
Other Configuration Settings |
Screen Resolution: 1024 x 768 (minimum)
DPI Setting: 100% |
Once you have system requirements verified, HP provides a pre installation check list to be followed to avoid any issues, here is it:
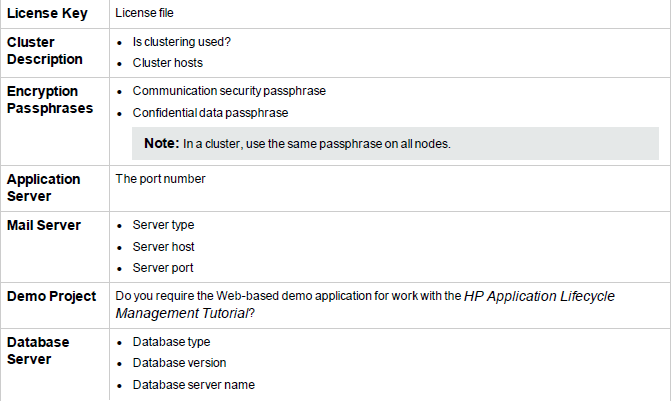
Pre-Installation Checklist
Review and verify the following checklist before installing ALM. This checklist outlines the information that you must supply during the installation process.
image001.png@01D7EF61.72CCA780″>

So once you are ready with everything above, you can proceed with installation, installation can be performed by logging into server remotely.
Installation instructions
Insert the media in DVD drive and it should auto-play or double click on DVD icon:

Following screen comes up
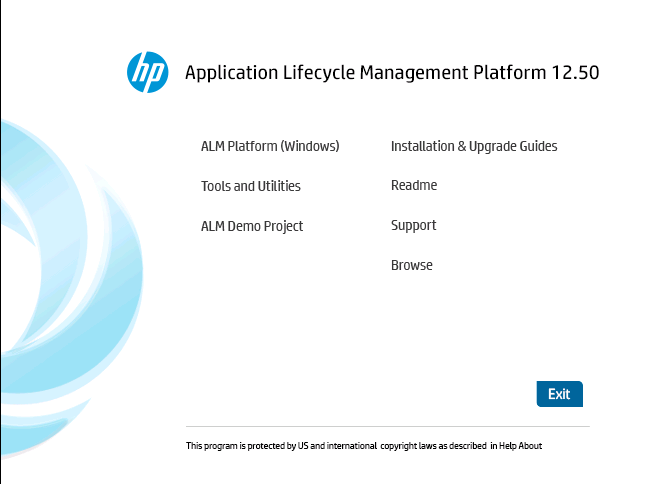
Click on ALM Platform (windows) and installation and following screen comes up
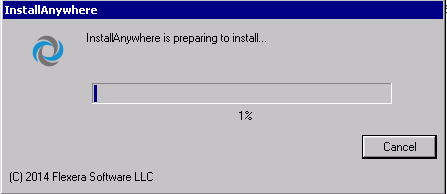
Let it finish, once it’s done, following screen comes up
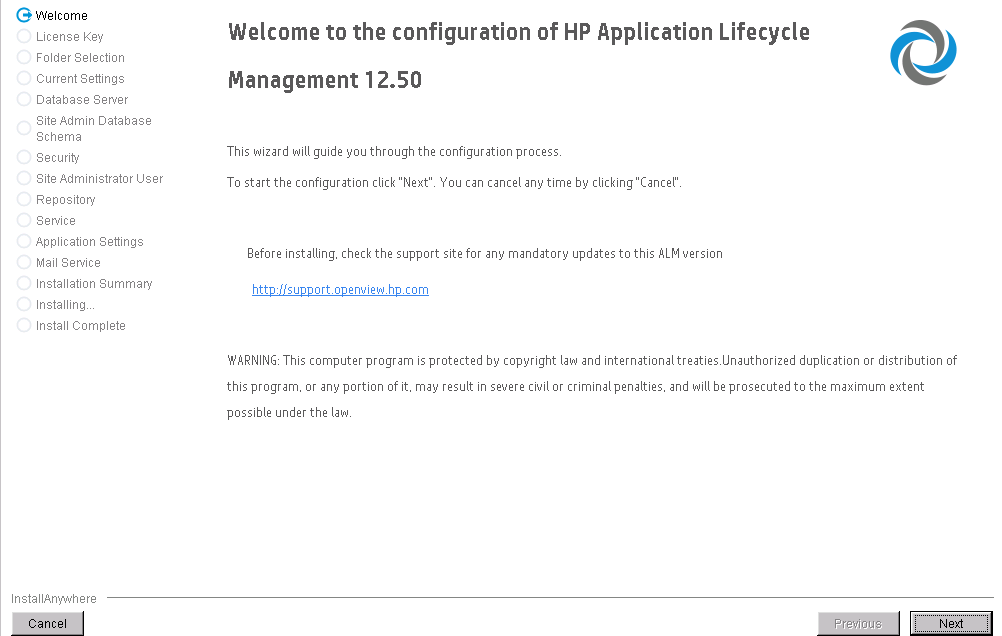
Welcome page appears, click Next
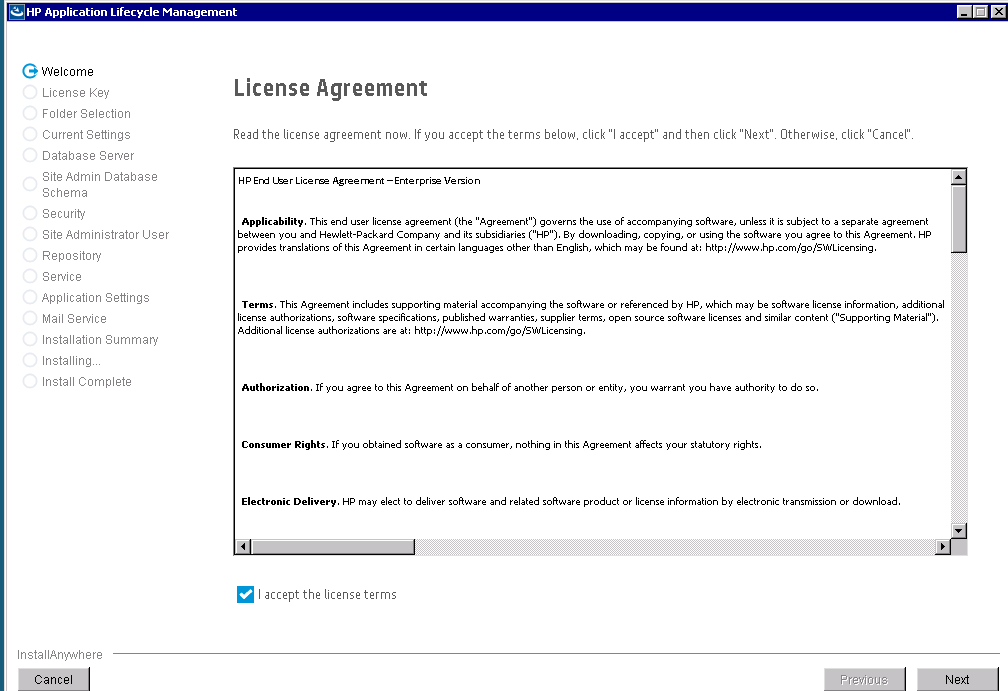
Accept the agreement and click Next
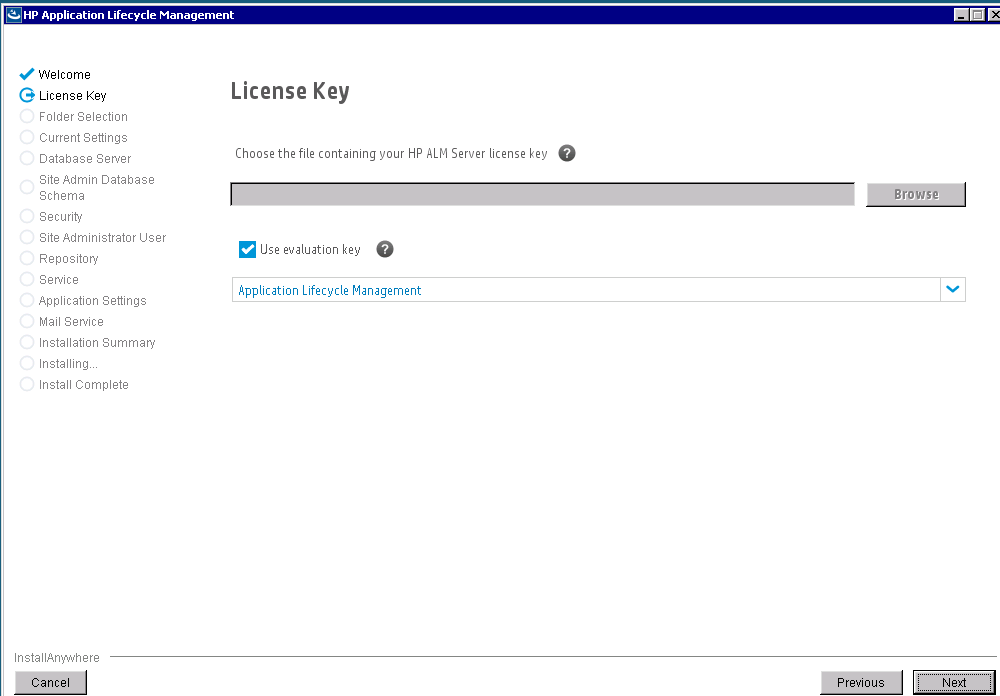
Upload license of select to use demo and click next
Click next
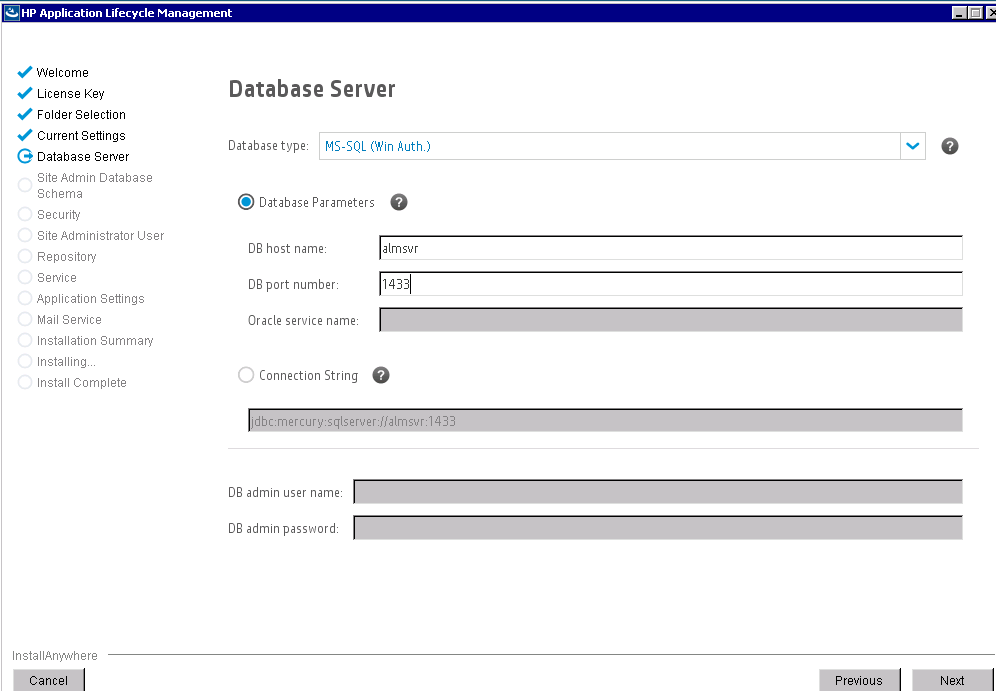
Provide database information
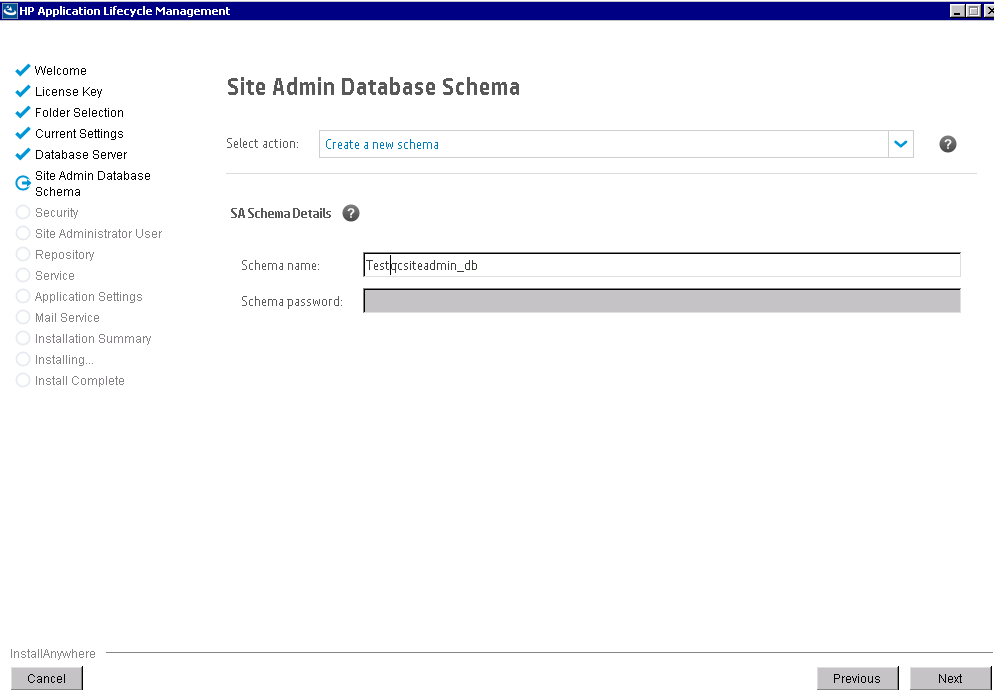
Select your database if it already exists, if not create a new one
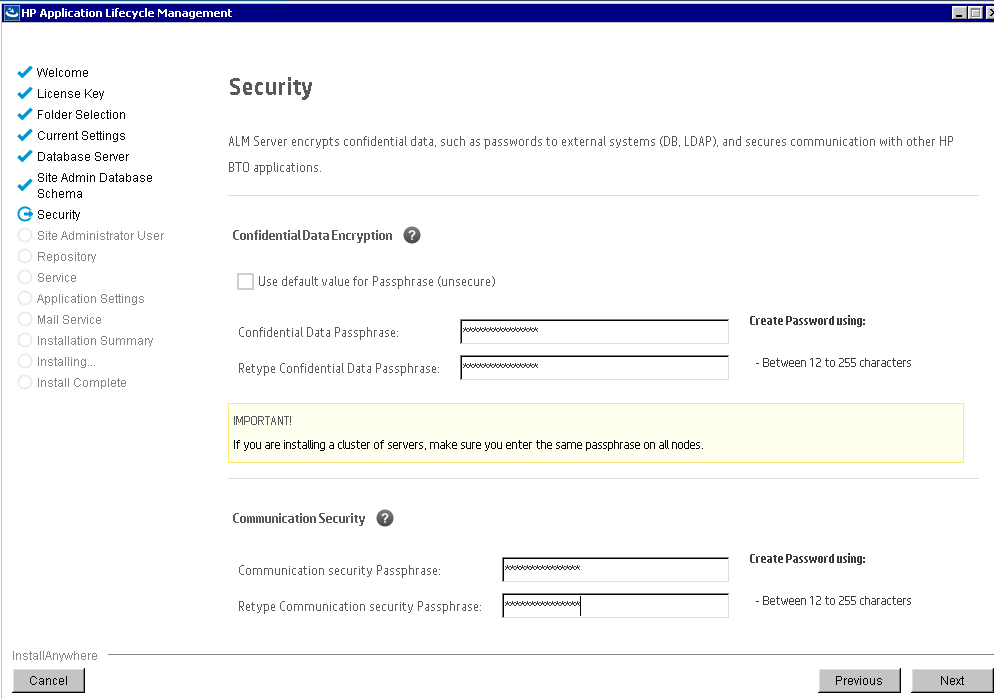
Provide security information, this is important to note it down whatever you configure above,
 Note:
Note:
Verify that you have passphrases for confidential data and communication security encryption.
For secondary cluster nodes, verify that you have the confidential data encryption passphrase that you
used to install the primary cluster.
When upgrading from an ALM 11.00 or later version of the Site Administration database schema, you
must use the same confidential data passphrase as was used for the previous installation.
Performance Center: You must use the same communication security passphrase for the ALM
and Performance Center server configurations.
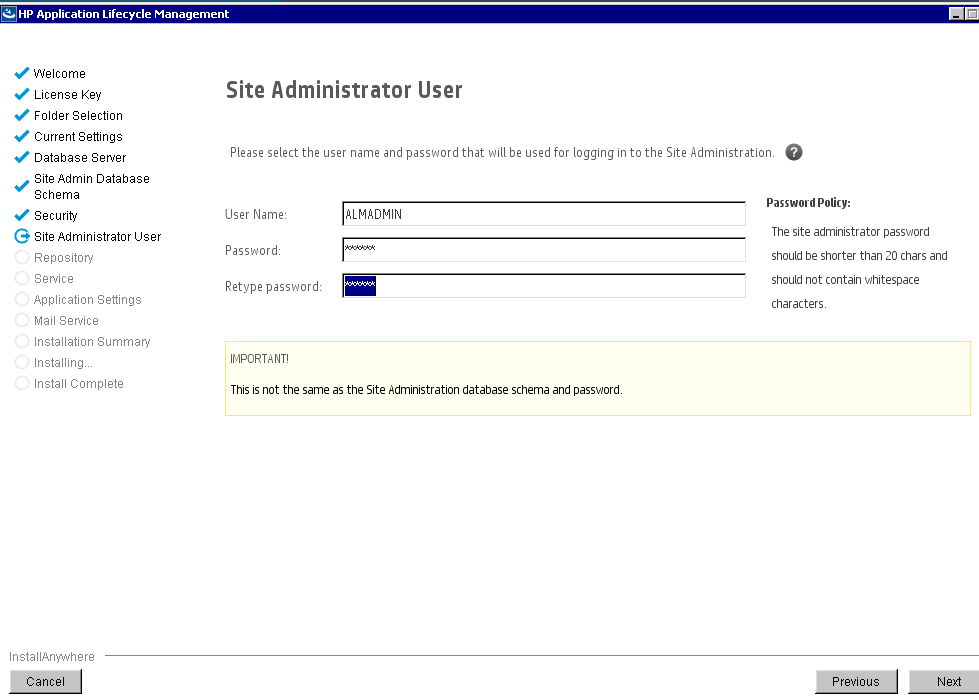
Create admin user and password
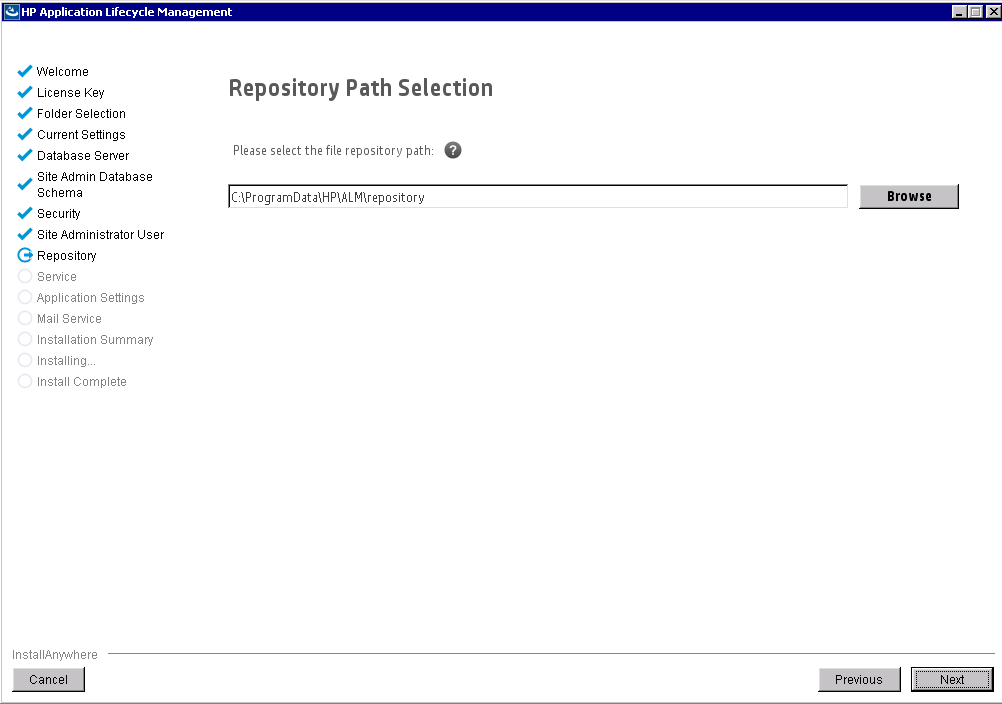
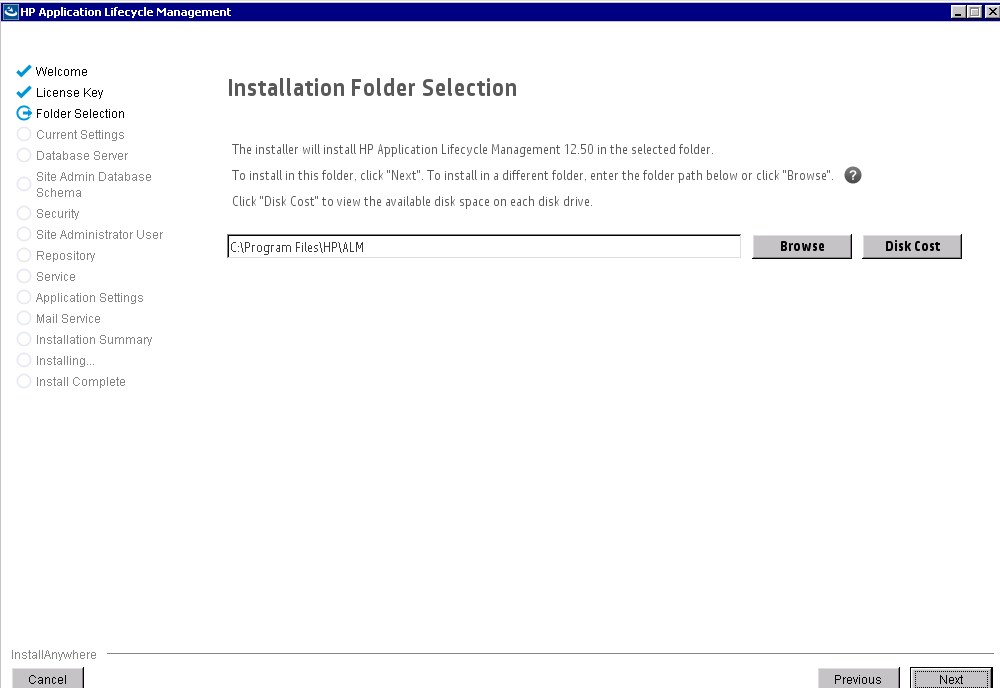
Select repository path and click next
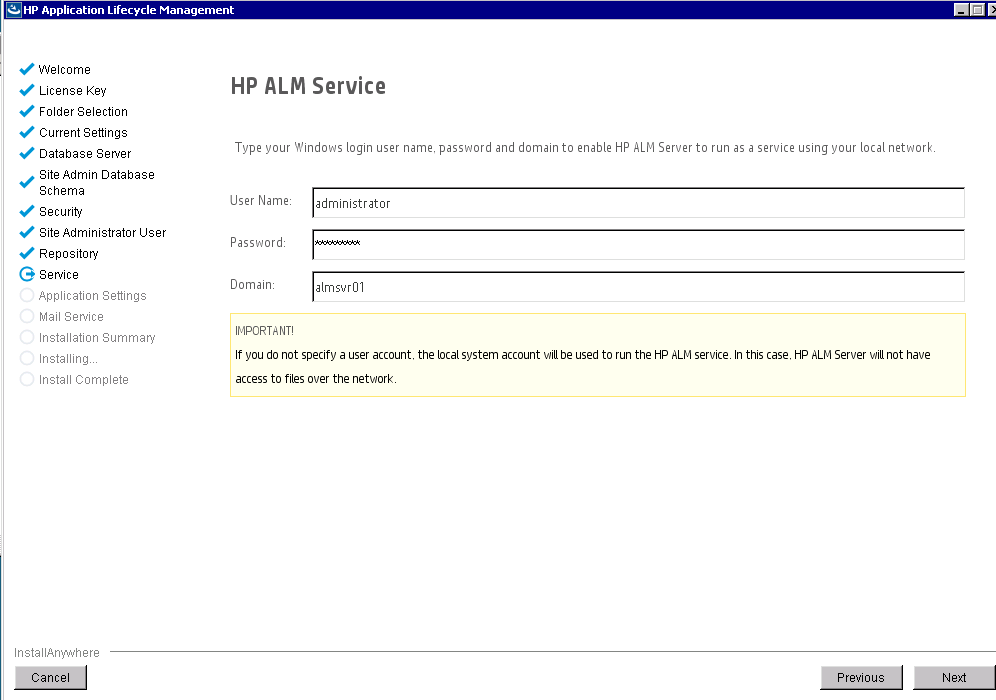
Provide admin user for service
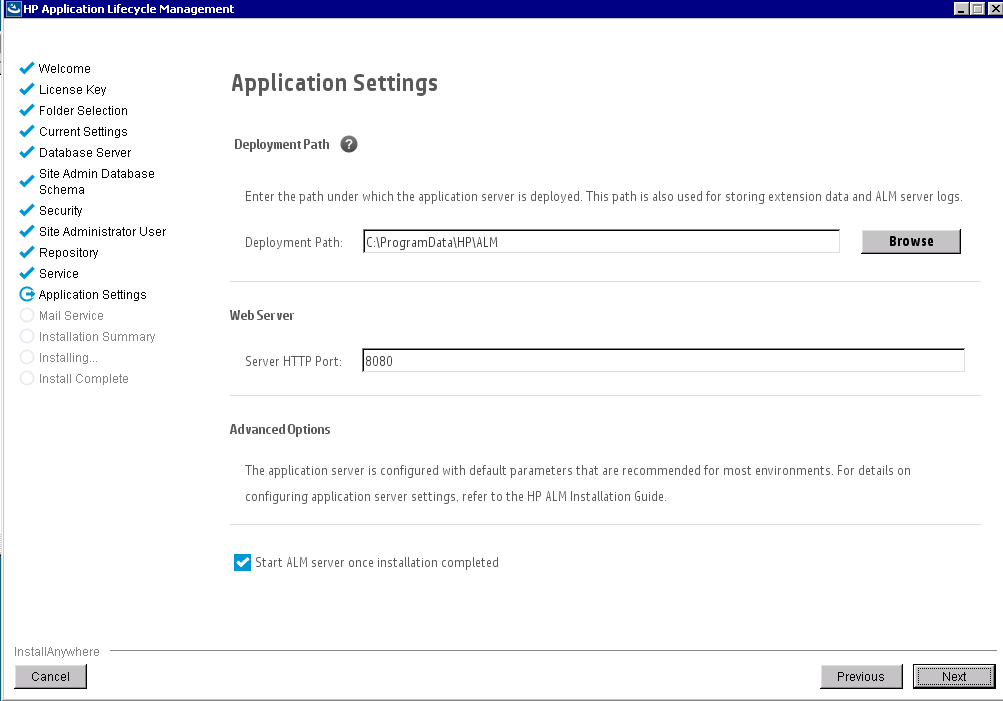
Check the deployment path and port number
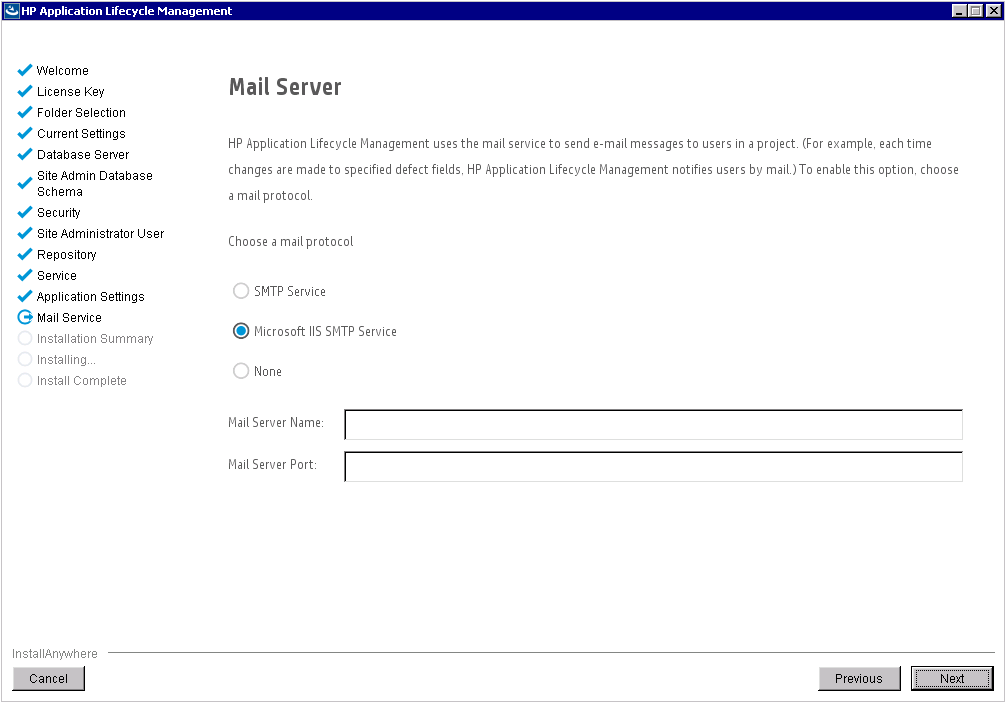
Configure SMTP if you have this information, you can also configure this later
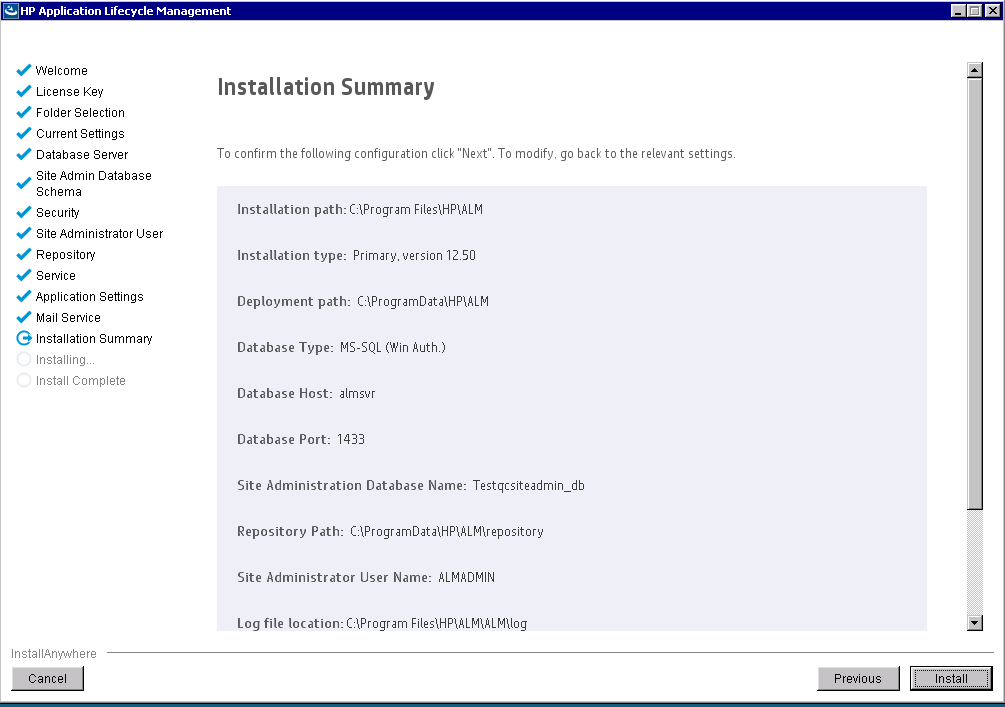
Review installation summary and click Install
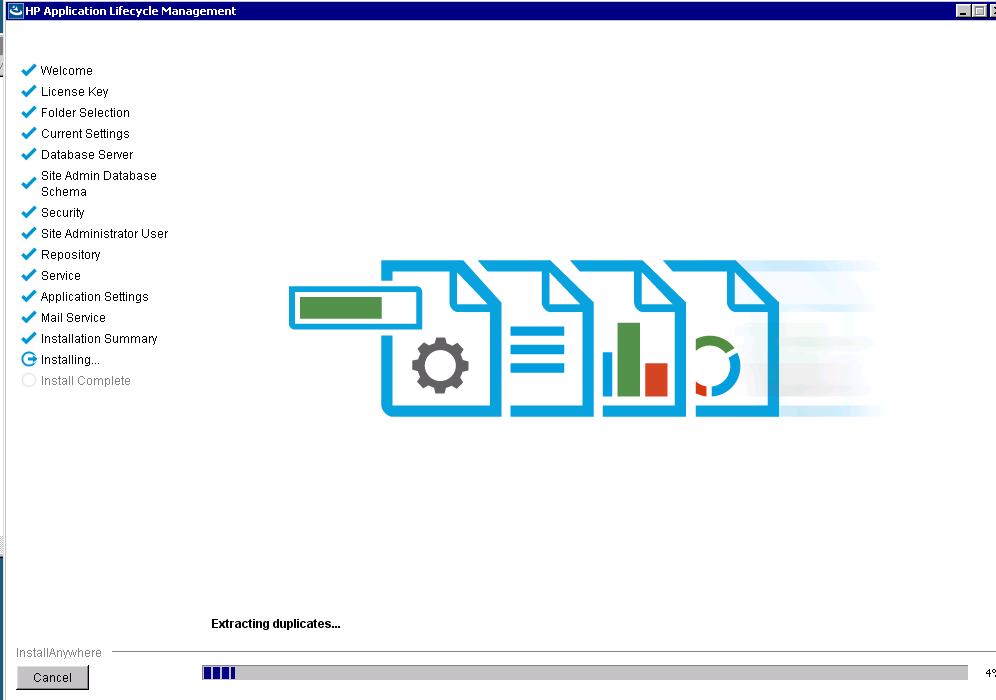
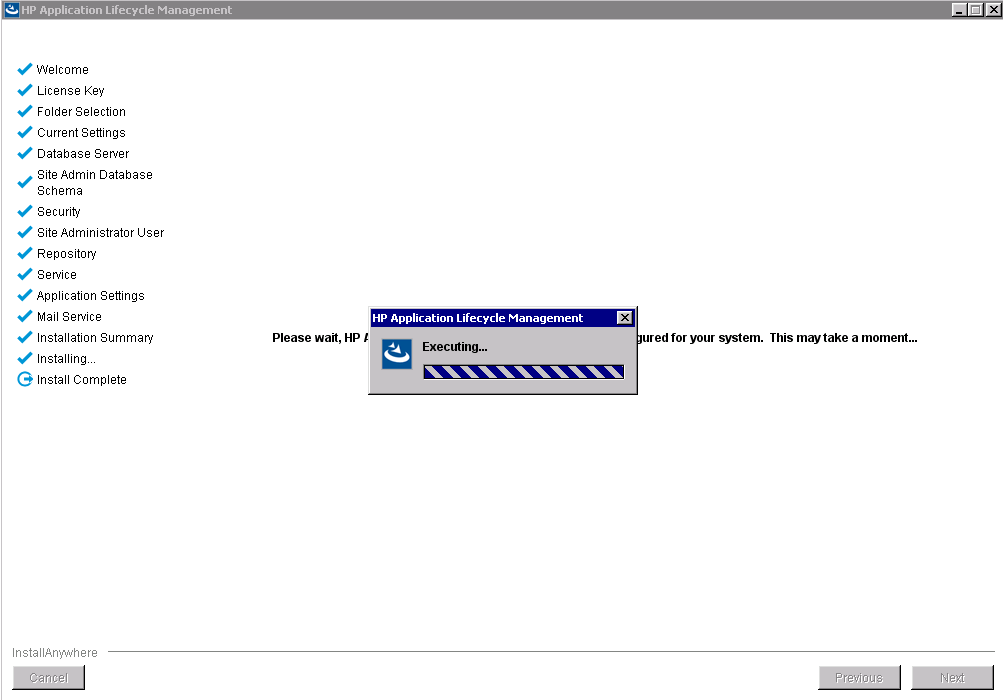
Installation begins
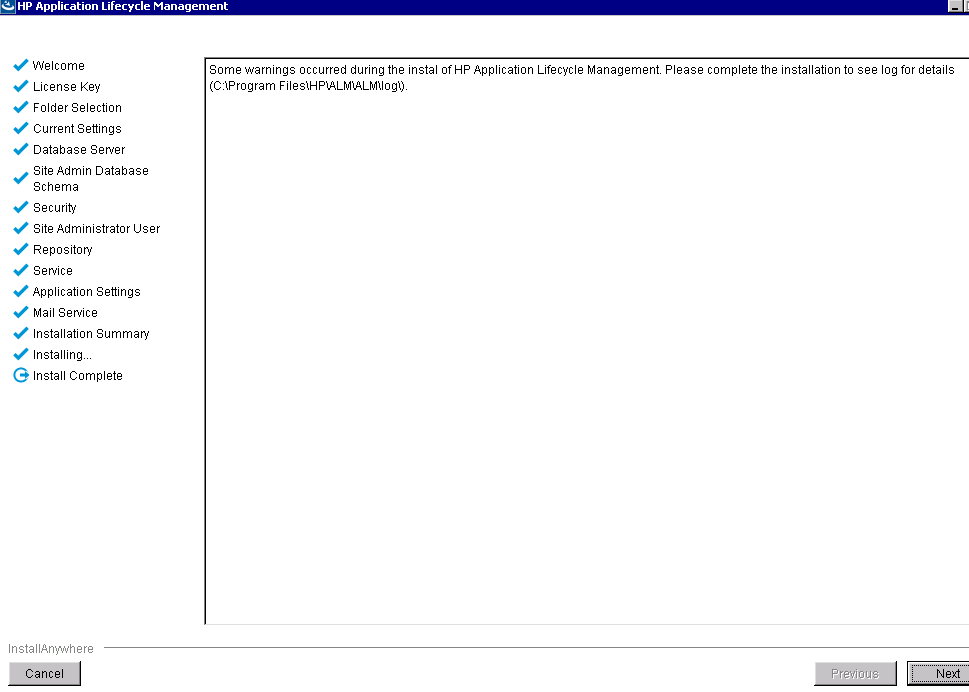
Click next
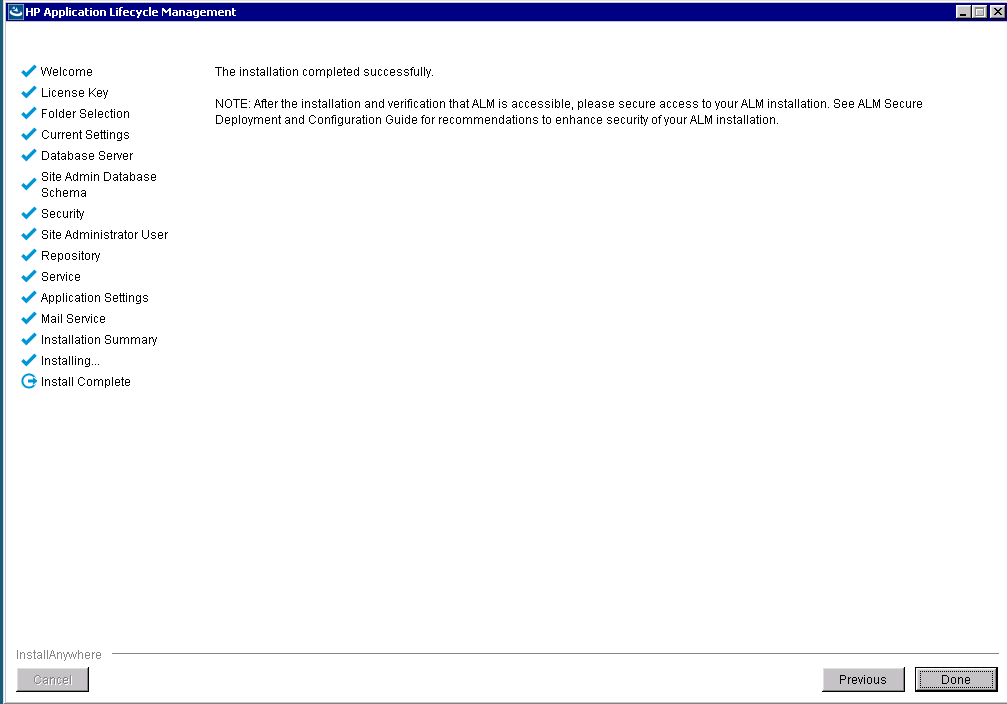
Click done, its complete, ALM launches
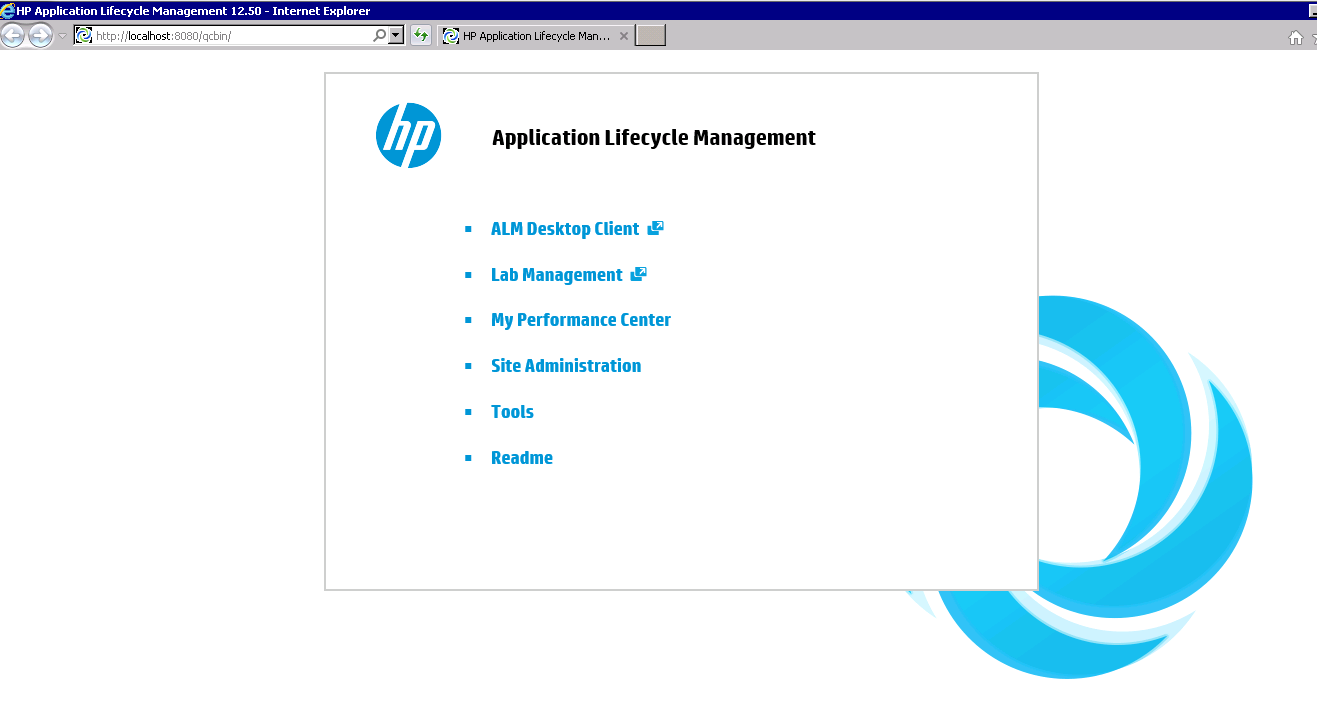
Note down the URL, it should be:
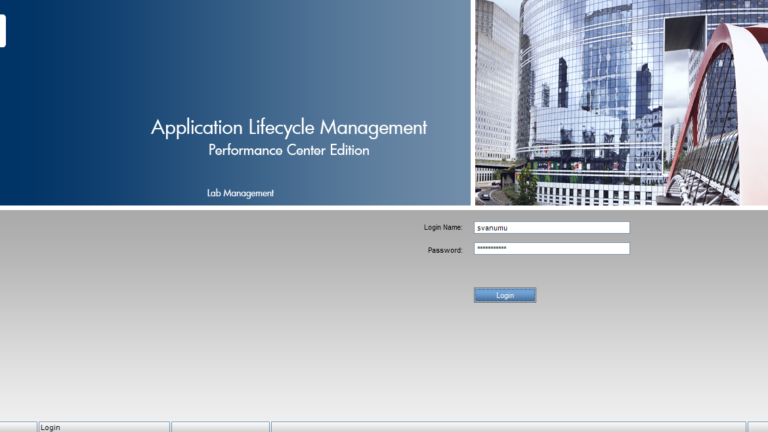
Verify that you are able to login with admin account you created above.
Hope this helps.