Add a data disk to an Azure VM step by steps?
How do I add a disk to an Azure Virtual Machine?
Adding disks to Azure virtual machines is common scenario and can be done through Azure portal Adding a disk will require following simple steps in the Azure Portal :
- Login to portal.azure.com with an Administrator account
- Find the Virtual Machine you’d like to remove a disk from.
- When you have found your virtual machine, click on ‘Disks’ in the left hand pane

- Click “add data disk” on your VM disks screen

- If you have not created a disk already, you can create a new disk right here, click on create disk:

6. create disk by selection appropriate options.
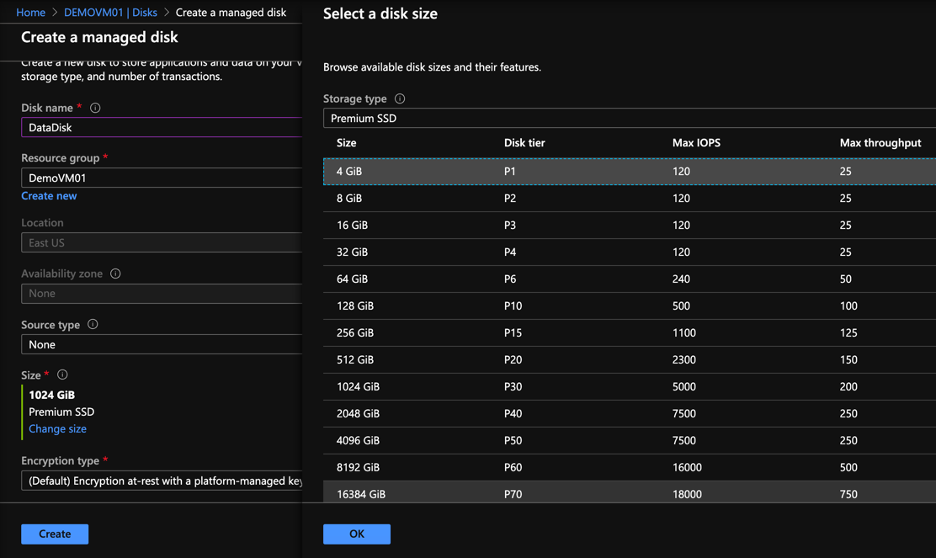
- Once disk is created and you it under data disks section, click. Save on the top

At any point you can see the progress of any action in notification area.
- RDP into the VM, go to. Disk management and you should see a new disk. format the volume to be able to see the same under My Computer


